




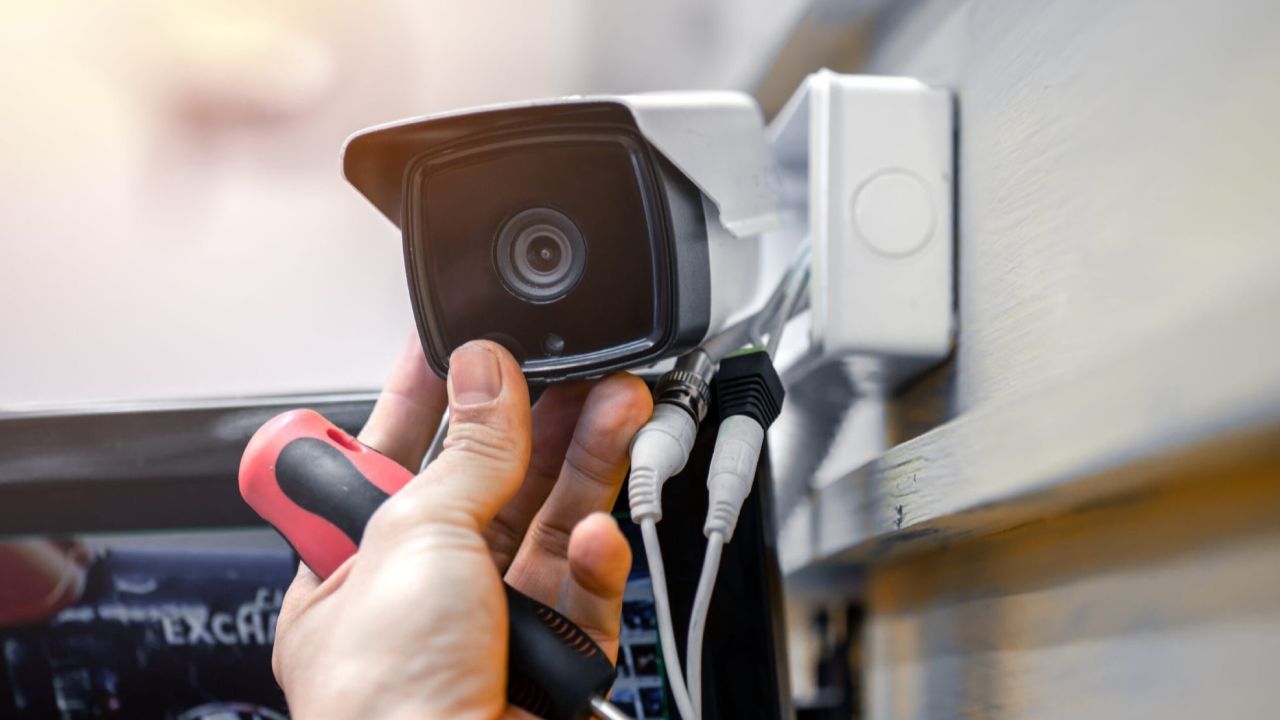
Essential Guide to Troubleshooting IP Camera Systems
Many people seek assistance with issues related to IP camera systems. Diagnosing problems within a surveillance camera setup can often prove to be quite complex. Here’s a comprehensive guide to help you resolve common issues.
First and foremost, verify that the IP camera is receiving power. The small red indicator on the camera or the light on the RJ45 port can be difficult to notice. Many modern IP cameras utilize Power over Ethernet (PoE), so ensure the network cable is securely connected and supplying power.
Another common issue may stem from the PoE switch itself. Some switches might not deliver adequate power—15W per port is often required. If the switch is overloaded, it may fail to power additional cameras. To diagnose this, try connecting the camera to a compatible PoE injector or midspan to determine if power is the issue.
Much like a computer, rebooting your camera can resolve many issues. Disconnect the power by either unplugging the camera or disconnecting the network cable, and wait approximately 15 seconds before reconnecting it.
Connectivity problems frequently arise from faulty connections. Connectors are often the weak link in electronic systems. It’s wise to check both ends of the cable to ensure they are connected correctly. If there’s any uncertainty, verify the connection using a functioning IP camera.
Ensure that the IP camera is recognized on your network. Use the ipconfig command to gather network information. Open the command prompt and type ipconfig to view your network settings. The Default Gateway listed is your router’s IP address, while the IP address of your computer appears next to "IP Address." Confirm that your computer (or Network Video Recorder - NVR) is on the same network as the camera. For example, if your computer’s IP starts with 192.168.xxx.xxx, your camera should also share that same IP range.
To determine if the IP camera is successfully connected to your system, employ the ping command. Open a DOS command prompt by typing "ping" into the Windows search box. For instance, if your camera’s address is 192.168.2.135, input ping 192.168.2.135 -t at the prompt. If you receive responses such as “Destination Host Unreachable” or “Request Timed Out,” it indicates a lack of connection to the camera, potentially due to the camera and computer being on different networks or subnets. Conversely, if you receive successful replies, you can proceed to connect using a web browser or the manufacturer's discovery tool.
If you are able to ping the camera but cannot access it via Video Management Software (VMS), web browser, or discovery utility, the issue may lie with incorrect login credentials. If you’re unsure of the password, consider resetting the camera to its factory settings. Consult the manufacturer's guidelines for the reset procedure.
Conflicts arising from duplicate IP addresses can create significant issues on your network. Knowing the camera's MAC address can aid in locating its IP address, typically printed on the camera or its casing. To view the IP and MAC addresses of connected devices, use the ARP command by typing arp -a in the command prompt. This will help you identify the camera’s IP address based on its MAC address and vice versa.
Sometimes, overly aggressive antivirus software may block access to your IP cameras. If other troubleshooting methods fail, temporarily disable the antivirus software. If this resolves the issue, look for settings that allow you to grant access to the IP camera.
As you troubleshoot, it’s crucial to tackle one issue at a time. Assess the outcome of each step before proceeding to the next. This systematic approach will help isolate the problem more effectively.
Articles
All articles
The Complete Guide to Retail Crowd Density Monitoring Using Video Analytics
The Complete Guide to Retail Crowd Density Monitoring Using Video Analytics
The Ultimate Guide to Occupancy Tracking Technology: Systems, Sensors, and Strategy
The Ultimate Guide to Occupancy Tracking Technology: Systems, Sensors, and Strategy
Maximizing Retail Performance: The Ultimate Guide to Heat Mapping Technology
Maximizing Retail Performance: The Ultimate Guide to Heat Mapping Technology
The Complete Guide to Deploying AI Video Analytics in Retail and Enterprise
The Complete Guide to Deploying AI Video Analytics in Retail and Enterprise
How to Design a Scalable Video Surveillance System for Multi-Site Retail
How to Design a Scalable Video Surveillance System for Multi-Site Retail
Upgrading Legacy CCTV: How to Integrate AI Without a Rip-and-Replace
Upgrading Legacy CCTV: How to Integrate AI Without a Rip-and-Replace
Upgrading Legacy CCTV: The Complete Guide to AI Security Camera Integration
Upgrading Legacy CCTV: The Complete Guide to AI Security Camera Integration
The Evolution of Video Analytics: How AI Transforms Security and Operations
The Evolution of Video Analytics: How AI Transforms Security and Operations
How AI Video Surveillance Solves Security Staffing Shortages and Reduces Costs
How AI Video Surveillance Solves Security Staffing Shortages and Reduces Costs

Maximizing Security System ROI: The Financial Case for Smart Surveillance
Maximizing Security System ROI: The Financial Case for Smart Surveillance

How to Calculate the ROI of a Business Security System
How to Calculate the ROI of a Business Security System
Master Multi-Brand CCTV Management: The Ultimate Guide to Brand-Agnostic Surveillance
Master Multi-Brand CCTV Management: The Ultimate Guide to Brand-Agnostic Surveillance

Strategic Guide to Retail Video Surveillance Migration: Upgrading Legacy Systems
Strategic Guide to Retail Video Surveillance Migration: Upgrading Legacy Systems

How to Reduce Commercial Security Costs Without Compromising Protection
How to Reduce Commercial Security Costs Without Compromising Protection

How to Reduce Retail Operational Costs With Video Analytics
How to Reduce Retail Operational Costs With Video Analytics
Security Staffing Optimization: The Complete 2026 Guide
Security Staffing Optimization: The Complete 2026 Guide

AI Retail Theft Prevention: How Smart Cameras Stop Shrinkage
AI Retail Theft Prevention: How Smart Cameras Stop Shrinkage

Modern Shopping Center Security Systems: The Complete Guide
Modern Shopping Center Security Systems: The Complete Guide
Video Management Systems Explained: Features, Benefits, and How to Choose the Right VMS
Video Management Systems Explained: Features, Benefits, and How to Choose the Right VMS

The Reality of the Single Pane of Glass: Achieving Unified IT Visibility
The Reality of the Single Pane of Glass: Achieving Unified IT Visibility
Try TRASSIR For Your Business
Learn more about how TRASSIR analytic modules work! Demo mode is an opportunity to see for yourself how the system works, and also check the interface and test all the functions.Success!
We will contact you as soon as possible