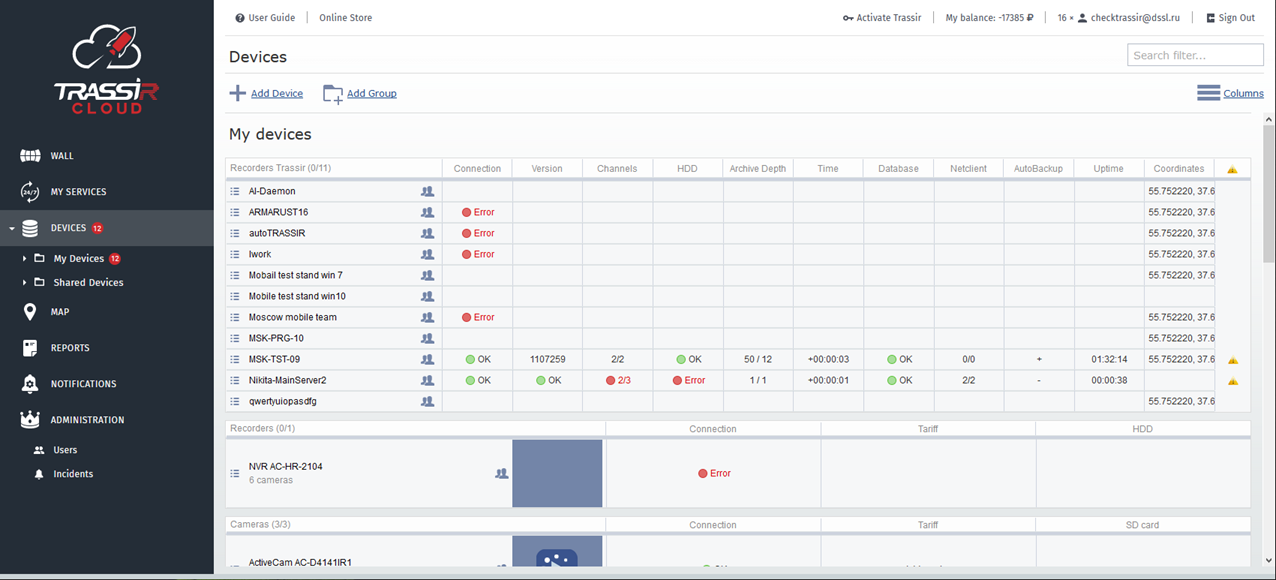
The process of connecting devices to the cloud depends on the type of the device and its manufacturer.
Warning
Before connecting devices to TRASSIR Cloud make sure your ports for outgoing UDP requests are not blocked.
Below you will find detailed instructions on how to connect each device type.
Connecting IP cameras
Tip
The connection process of TRASSIR, ActiveCam, HIKVISION and HiWatch IP camera is the same. The below described consequence of actions will suit for any manufacturer cameras.
On the camera:
Warning
Before connecting the camera to the cloud make sure that settings of network ports are set to default.
-
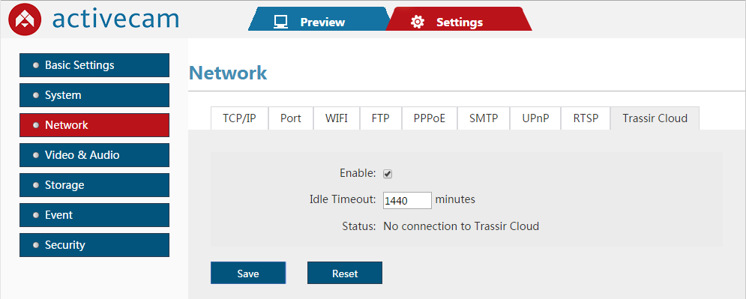
Open network settings page in the device's WEB-interface and find the TRASSIR Cloud tab
Tip
If there is no Trassir Cloud tab, then you should update the device's software. You can find a detailed guide and the latest version of the software on our website:
-
Check the Enablebox, and in the Idle Timeout field enter the period of time during which the camera will be available for connecting to the cloud.
Important
Upon the predefined lapse of time, the connection capability on camera will stop. To resume it, the IP camera should be restarted.
This guarantees that the camera's connection to the cloud is being made specifically by you, and that only you have access to its video data.
- Save the settings.
In the cloud:
-
Step 1.
Click the Add device link on the Devices page.
-
Step 2.
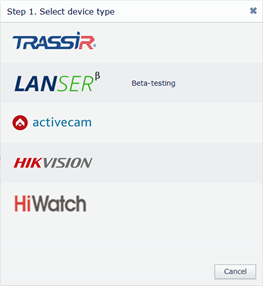
Select the TRASSIR (camera), ActiveCam, HIKVISION or HiWatch manufacturer .
-
Step 3.
Enter the IP camera's MAC address, which you can find on the camera's nameplate or in the web interface in the system information tab.
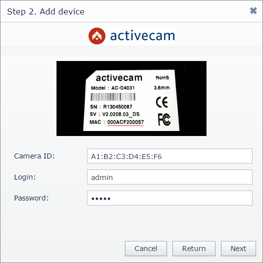
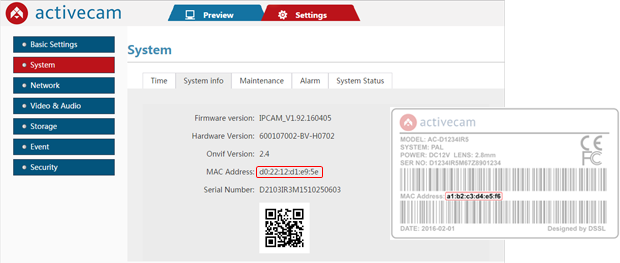
Enter Username and Password, and click the Next button.
Important
The current user should have the rights to change the camera settings.
-
Step 4.
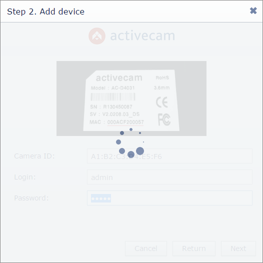
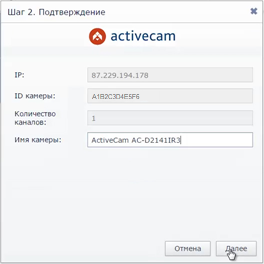
Wait a few seconds while the cloud is connecting with the IP camera. After the connection is established, verify the model of the connected camera in the Camera name field and complete the connection by clicking the Next button.
Tip
Monitor the camera connection process in the web interface using messages in the Status field:
Unknown Status- the cloud connection feature is disabled.Connected to Trassir Cloud, idle- a connection with TRASSIR Cloud is established. Connect the camera to the cloud.No connection to Trassir Cloud- there is no connection with TRASSIR Cloud.Connected to Trassir Cloud, working- the camera is connected. The video is being transmitted to the cloud."Idle Timeout" reached, service stopped- the time required for the connection of the camera to the cloud has expired.
Connecting TRASSIR Lanser video recorders
On the device:
Warning
Before you connect the recorder to the cloud make sure that the values of the network ports are set to default.
-
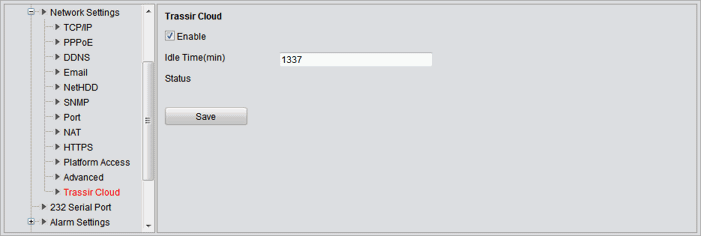
Open network settings page in the device's WEB-interface and find the TRASSIR Cloud tab
Tip
If there is no Trassir Cloud tab, then you should update the device's software. You can find a detailed guide and the latest software version on our website.
-
Check the Enable box, and in the Idle Time(min) field enter the period of time over which the device will be available for connecting to the cloud.
Important
Upon the specified time lapse, the device cloud connection capability will stop. Restart the device to resume it.
This guarantees that the device's connection to the cloud is being made specifically by you, and that only you have access to its video data.
- Save the settings.
In the cloud:
-
Step 1.
Click the Add device link on the Devices page.
-
Step 2.
Select Lanser.

-
Step 3.
Select the device's MAC address, which you can find on the nameplate or in the web interface in the Network settings tab.
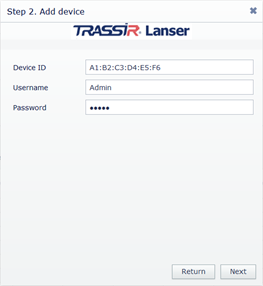
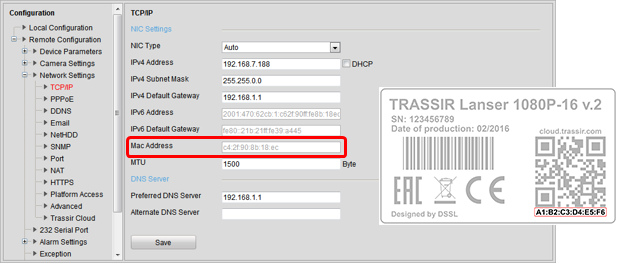
Enter Username and Password, and click the Next button.
Important
The current user should have the rights to change the device settings.
-
Step 4.
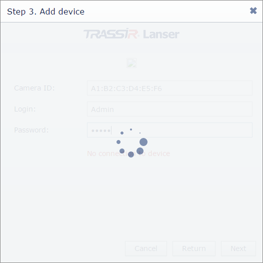
Wait a few seconds while the cloud connects with the IP device. After the connection is established, verify the model of the connected device in the Camera name field and complete the connection by clicking the Next button.
Tip
Monitor the camera connection process in the web interface using messages in the Status field:
Unknown Status- the cloud connection feature is disabled.Connected to Trassir Cloud, idle- a connection with TRASSIR Cloud is established. Connect the camera to the cloud.No connection to Trassir Cloud- there is no connection with TRASSIR Cloud.Connected to Trassir Cloud, working- the camera is connected. The video is being transmitted to the cloud."Idle Timeout" reached, service stopped- the time required for the connection of the camera to the cloud has expired.
Connecting TRASSIR 4 servers
-
Step 1.
Click the Add device link on the Devices page.
-
Step 2.
Select TRASSIR (server) and press Next.

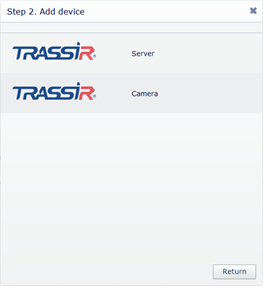
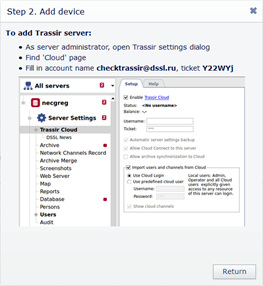
Remember the Account name and Ticket.
-
Step 3.
Go to the connected TRASSIR 4 server settings in the TRASSIR Cloud tab and enter the Account name and Ticket into the corresponding fields.
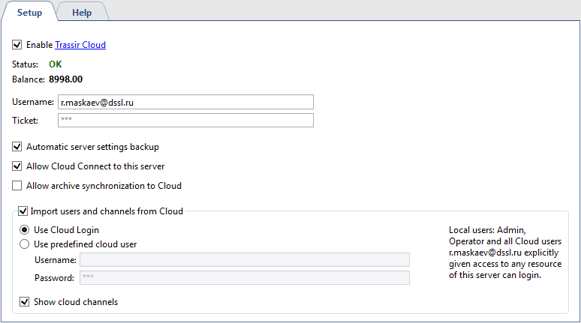
Tip
You can read more about TRASSIR 4 server work with the cloud in the Administrator's Guide.
Connecting analog cameras
Connect your analog cameras to the video signal processing devices for transmission to the cloud. You can use a PC with TRASSIR 4 and TRASSIR Lanser video recorders. The connection procedure of these devices to the cloud is described above.

