These instructions will help you move a PostgreSQL database from one server to another. We will consider the process of moving a database using PostgreSQL DBMS version 9.3.4 on Windows 7 as an example.
First, prepare the new PostgreSQL DBMS server to which the database is being migrated. To do this:
Create a backup copy of the old database. To do this:
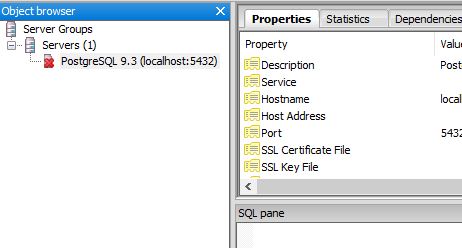
- Launch the pgAdminIII utility (Start -> PostgreSQL 9.3 -> pgAdmin III).
- Connect to the database by double-clicking on PostgreSQL 9.3 (localhost:5433). If you are prompted for a password, enter the superuser's password that was specified during installation of the DBMS.
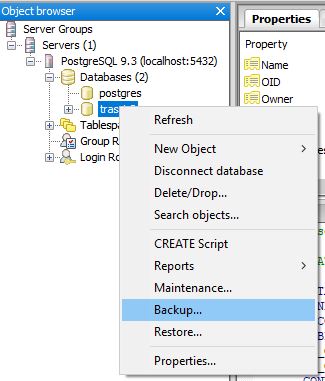
- In the tree, select the database that you want to move to the new server and select Backup... in the context menu
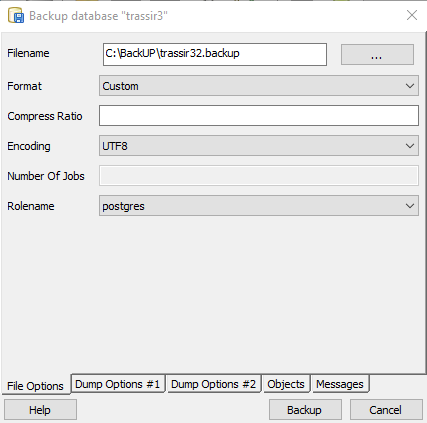
- On the window that opens, in the File Options tab:
- Enter the Filename of the backup;
- In the Format field, select Custom;
- Leave the Compress Ratio field unchanged;
- In the Encoding field, select UTF8;
- In the Rolename field, select postgres;
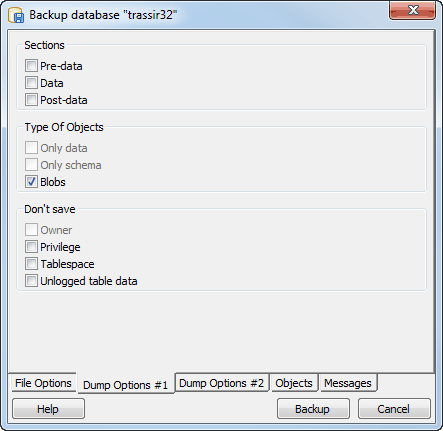
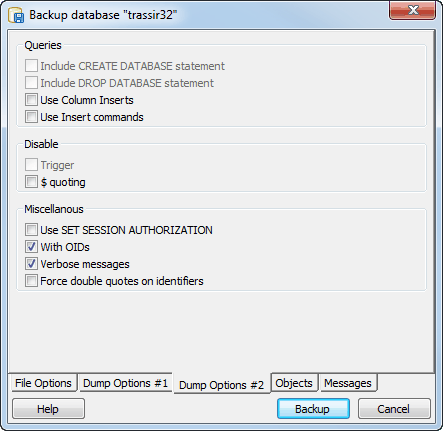
- In the Dump Options #1 and Dump Options #2 tabs, set the checkboxes as shown in the images below:
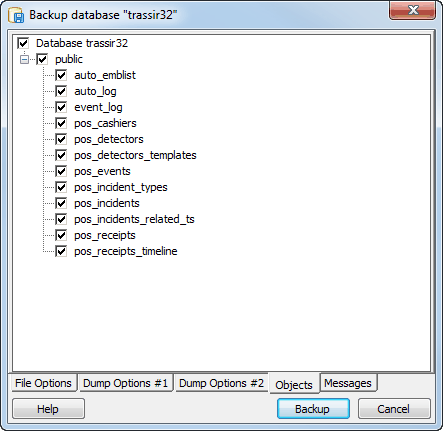
- Go to the Objects tab and set all of the checkboxes in the object tree:
- Go to the Messages tab and start backing up the database by clicking the Backup button.
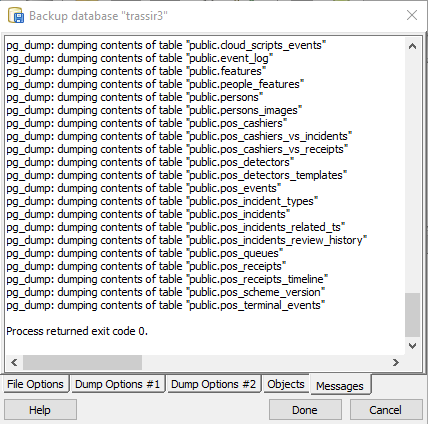
As the backup is created, messages will be displayed in the window. If the backup is created successfully, then Process returned exit code 0 should appear last. Otherwise, verify the settings described above and repeat the process to create a backup.
After the backup has been created, move it to the new server and use it to restore the database. To do this:
- Launch the pgAdminIII utility (Start -> PostgreSQL 9.3 -> pgAdmin III).
- Connect to the database by double-clicking on PostgreSQL 9.3 (localhost:5433). If you are prompted for a password, enter the superuser's password that was specified during installation of the DBMS.
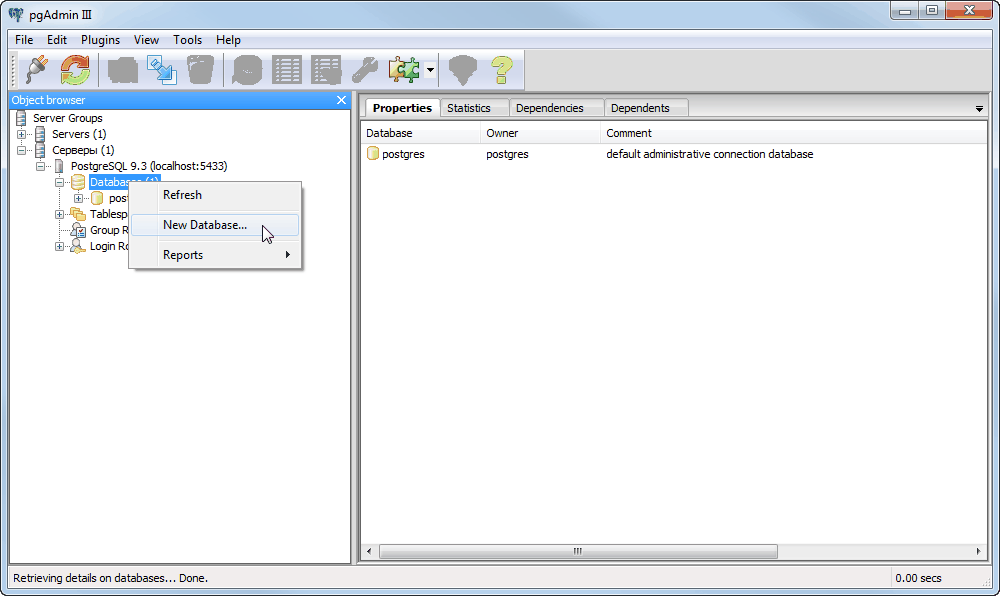
- Select Databases in the tree and select New Database... in the context menu
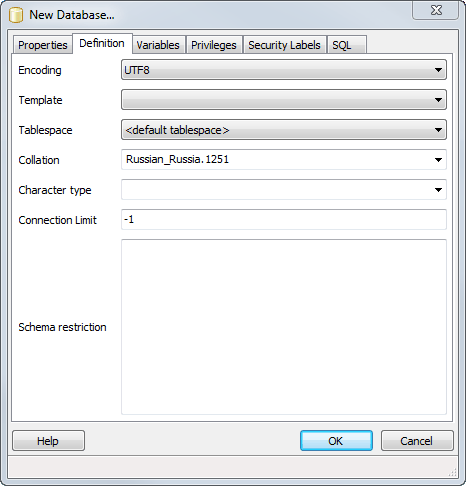
- In the window that opens, in the Properties and Definition tabs, enter the parameters just as they appear in the images below:
In the Name field, enter the name of the database on the new server. Leave the parameters on the remaining tabs unchanged and click OK to create the new database.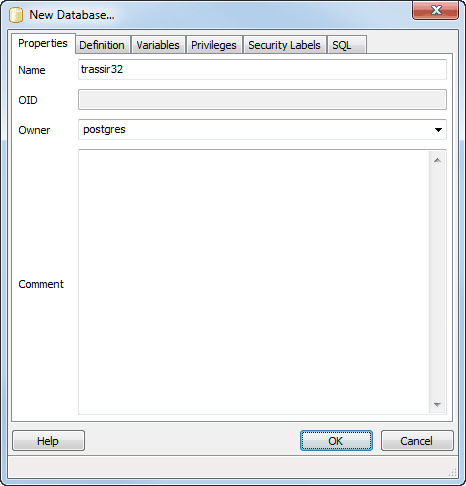
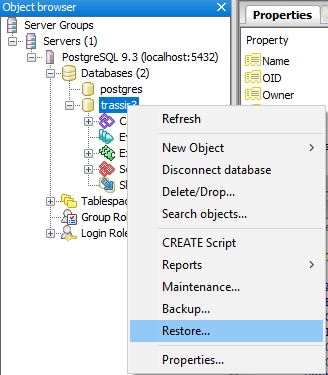
- Select in the tree the newly created database and select Restore... in the context menu
- On the window that opens, in the File Options tab:
- In the Format field, select Custom or tar;
- In the Filename field, enter the path to the previously saved backup;
- Leave the Number of Jobs field unchanged;
- In the Rolename field, select postgres;
Leave the remaining tabs' parameters unchanged.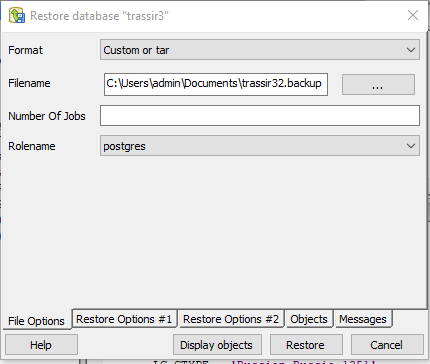
- Go to the Messages tab and start restoring the database by clicking the Restore button.
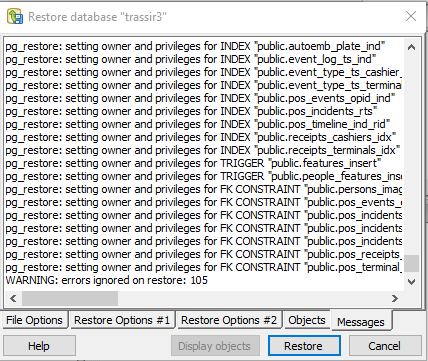
As the database is restored, messages will be displayed in the window. If the database is successfully restored, then Process returned exit code 0 should appear last. Otherwise, verify the settings described above and repeat the process to restore the database.
This completes the PostgreSQL database migration process. Now you can change the database connection settings in TRASSIR.

