Generally, all of the available data must be analyzed when examining a violation or dispute. This tab is designed for searching for a specific event in order to analyze all the data associated with the event.
The search results are displayed in the corresponding areas of the interface, each of which can be used to navigate the following events:
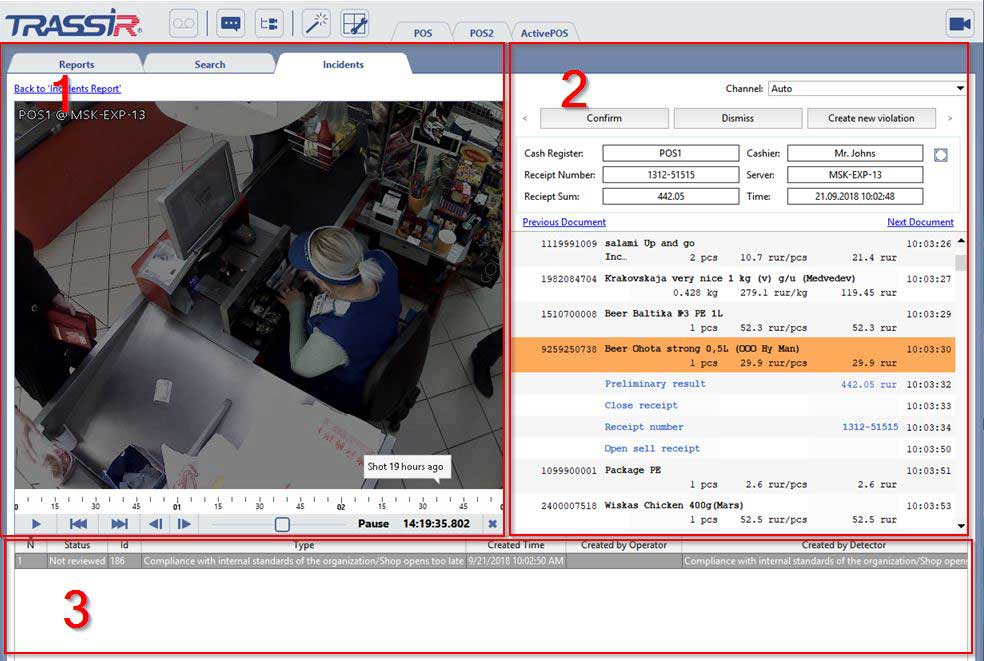
- The video archive recorded at the time of the event is displayed in the video area. You can use the timeline or player butters to switch between events.
- The cash register area contains information about the operations performed at the terminal at the time. Click on a receipt position to switch to the desired event.
- The data area displays the information saved in the database at the time of the event: Time, Terminal, Cashier Name, Quantity, Amount, etc. Click on a line to switch to the corresponding event.
To reduce the size of the list of events displayed in the data area or find a specific event, you can use one of the search options located on the Search and Advanced Search tabs
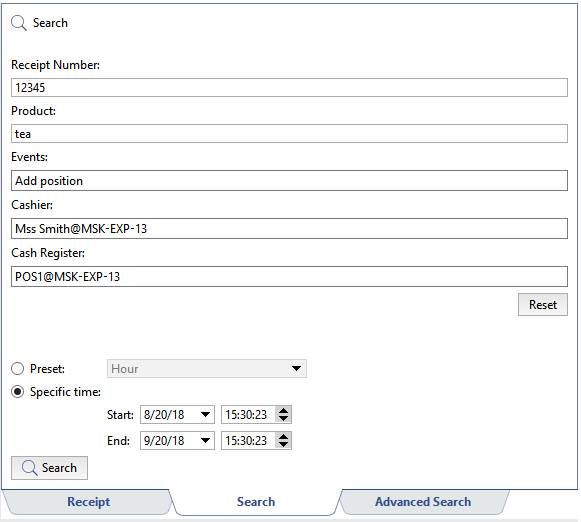
A simple search can be used to quickly find events when creating a filter is not necessary, filtering all events, or when the basic search parameters for finding a receipt or event are known. The search uses the following parameters:
- Receipt Number - Search based on receipt number;
- Product - Search based on barcode, stock number, or a product name;
- Events - Search based on event type;
- Cashier - Search based on the cash register operator.
- Cash Register - Search based on cash register;
- The time period over which the search is performed is selected from preset options or specified in the Start and End fields.
Click the Search button to begin the event search. When the search is complete, the Receipt tab will open and all the events that match the search criteria will be displayed in the data area.
If the simple search parameters are insufficient, then you can use the advanced search, which uses event and receipt filters.
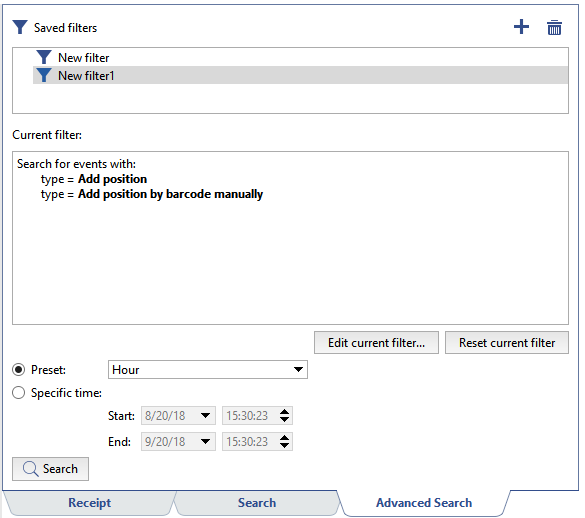
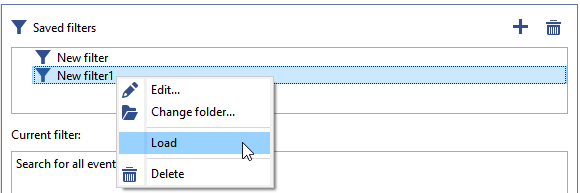
All previously created filters are displayed in the Saved filters field. To use one, select the desired filter and select Load in the context menu or double-click on the filter. The search logic will be shown in the Current filter area.
Then, just as with simple search, specify the time period and click Search. When the search is complete, the Receipt tab will open and all the events that match the filter's settings will be displayed in the data area.
If the existing filters are not suitable, you can edit the loaded filter by clicking the Edit... button or click  to create a new one. Learn more about creating filters in Filtering check events.
