As an example, we will now create a template containing the following zones:
- a zone for displaying signals from 4 cameras,
- an object tree with a filter to display only "dysfunctional" devices, e.g. devices that aren't connected,
- and a map.
To create a template containing these items:
-
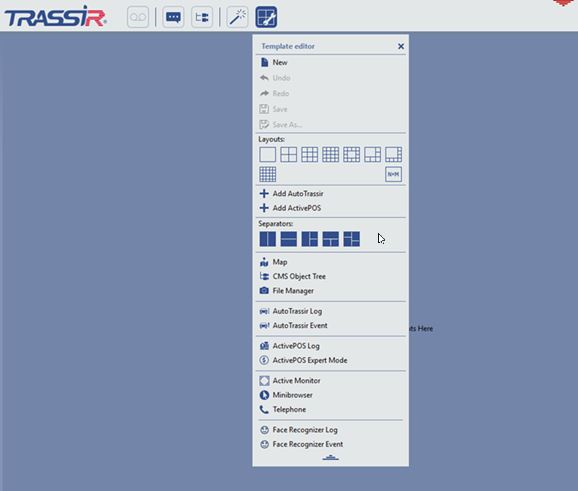
Click the template settings button
 at the top of the screen.
-
In the opened window, click the
 button to see additional menu items.
-
Select the separator that looks like
 by left click. This will split the template into three zones, according to the separator's icon.
-
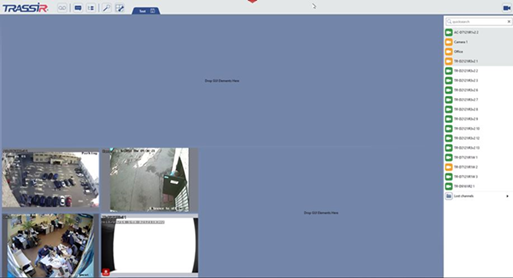
Arrange the signals from 4 cameras. To do this:
- Select the layout that looks like
 and drag it onto the left lower zone. The zone will be highlighted in light blue.
- Release the left mouse button once the layout's location has been fixed.
- Drag the signals from 4 cameras onto the newly created layout. The list of cameras is located on the right; if it is hidden,
expand it using this button
 ).
).
- Select the layout that looks like
-
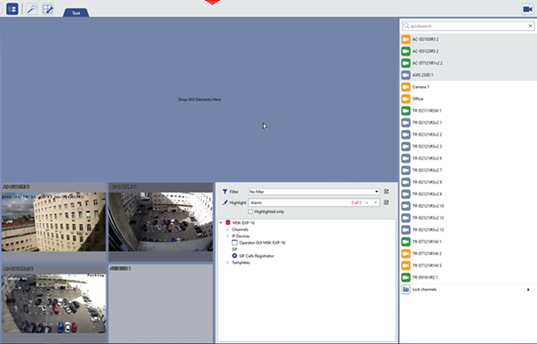
Place the object tree and set up a filter to display "dysfunctional" devices only. To do this:
- Click the template editor button.
- Select Object tree (CMS) and drag it onto the upper right zone.
- Release the left mouse button after fixing the object tree's position.
-
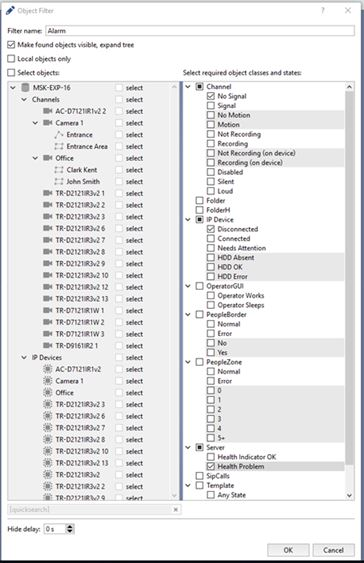
In the newly added area, expand the Object filter dropdown menu and select Add.

-
Name the filter and set the checkboxes to define which objects the filter should display:
- In the Channel group, select "No signal" checkbox.
- In the IP device group, select the "Disconnected" checkbox.
- In the Server group, select the "Health Problem" checkbox.
After the new filter has been added, the tree should only include trouble objects: channels with no signal; IP devices with no connection; and TRASSIR servers whose system health troubles.
-
Place the map in the bottom zone. To do this:
- Select Map from the menu and drag it to the bottom zone.
- Release the left mouse button once the map location has been set.
- Select the map that will be displayed in this zone from the Maps dropdown list.
Tip
The list of maps will be empty if the administrator hasn't added any maps to the system.
-
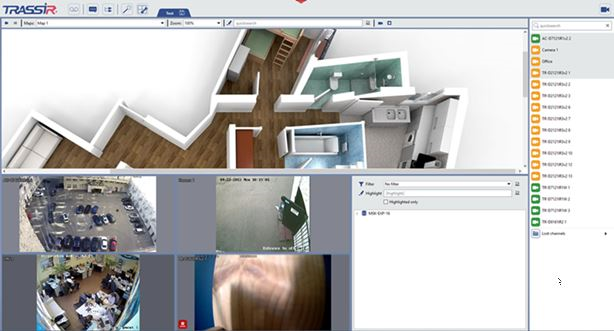
Change the sizes of the zones, if desired. To change the sizes of the zones:
- Point the cursor at a zone border. It will change into
 or
or  .
.
- Left-click and, without releasing, change the aspect ratio of the zones.
- Release the left mouse button once the new zone sizes have been set.
- Point the cursor at a zone border. It will change into
-
In the main menu, click
 to save the template.
-
Name the template and press OK.

