This tab shows a report of all of the incidents that took place in a selected period, which require expert examination for subsequent analysis of a situation.
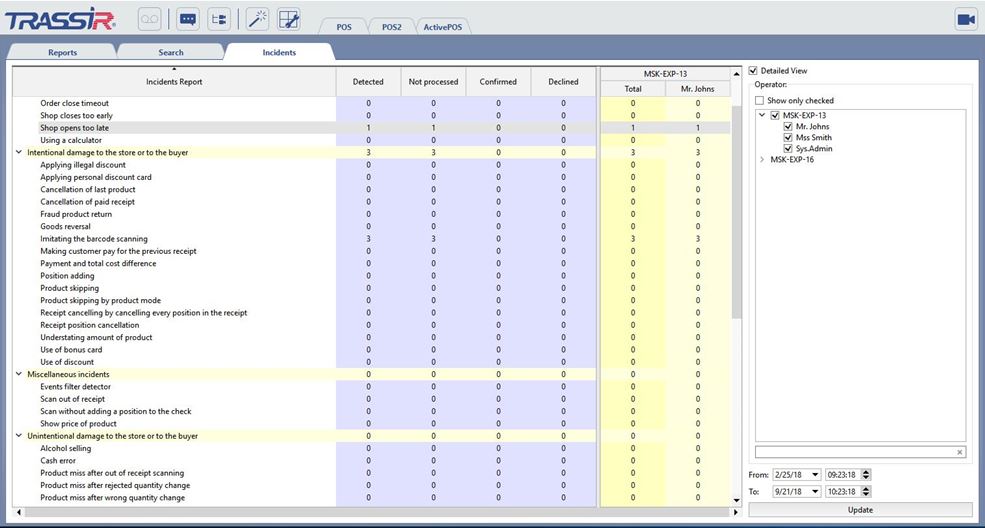
To the right of the report there is a group of settings that will help you refine your report filtering:
- A report is displayed for each item when the Detailed View checkbox is set. Otherwise the data is summarized for each connected server.
- In the Cashiers group, you can select the names of the cashiers to be included in the list.
- You can indicate the report's date range in the From and To fields.
The incident report includes all of a cashier's or retail outlet's violations, which were detected using the sensors configured by the administrator. When an incident or a violation is detected, TRASSIR assigns it the status of "Not viewed". Only after analyzing the available data can an expert or operator assign the status of "Confirmed" or "Dismissed" to an incident, thereby either confirming or dismissing the violation.
Tip
A red number of incidents indicates that this cashier had the most violations of that type.
To analyze incidents or view previously analyzed incidents, select the line with the desired incident type and the column with the desired status or cashier name. To display the incident list, double-click the cell. The incident analysis window will open. It has the following functional zones:
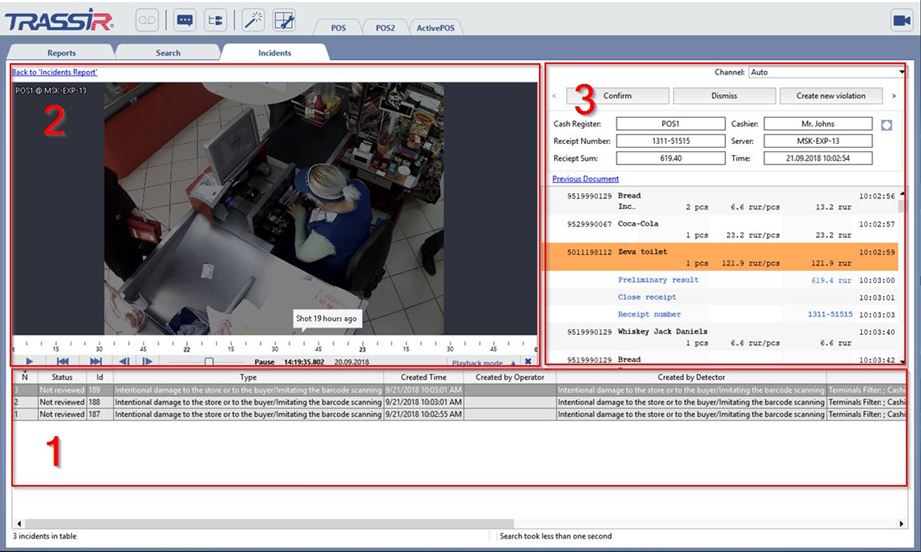
- A list of all incidents of the selected type, status, and cashier.
- Archive window, which displays a video frame recorded at the time the incident took place.
- A window for the data obtained from the POS terminal at the time of the incident.
Now you can select an incident from the list and double-click on the incident's line to begin analyzing it. The video archive and data obtained from the POS terminal will help you make a final decision about the selected incident. You can decide on one of three options:
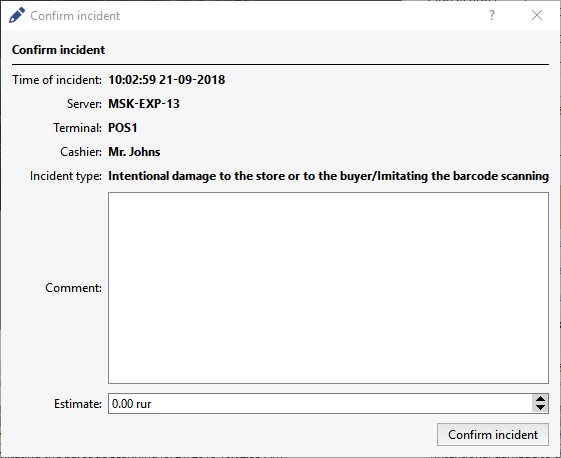
- Confirm. This option changes the status to "Confirmed" and comments and the amount of damages that may be charged to the violator
are entered as supplementary information.
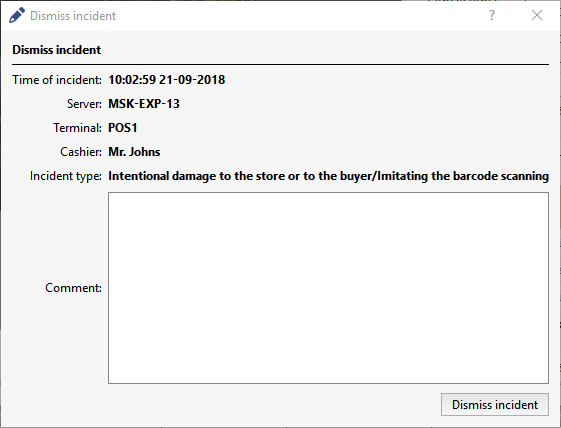
- Dismiss. This option changes the status to "Dismissed" and you can indicate the reason for dismissing the incident as a comment.
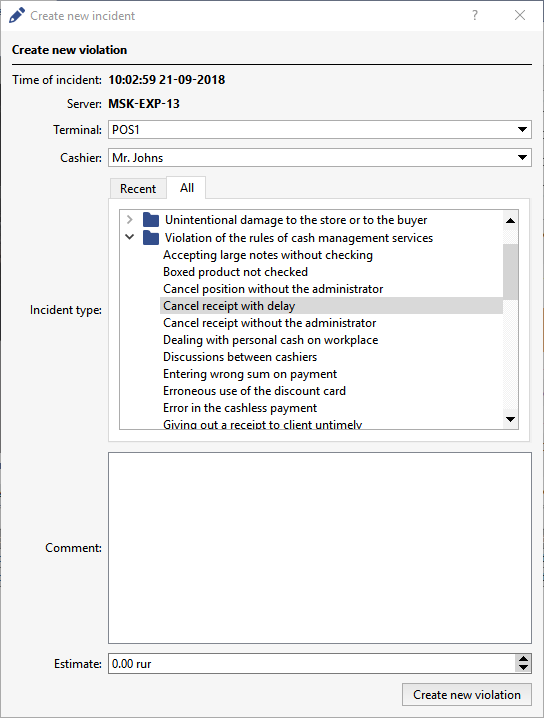
- Create new violation - This is an advanced version of confirming the incident. It lets you change the incident type, cashier name, and incident
location. Just as during incident confirmation, you can enter comments and an amount of damages.
Tip
A list of frequently used incident types is automatically generated as this feature is actively used.
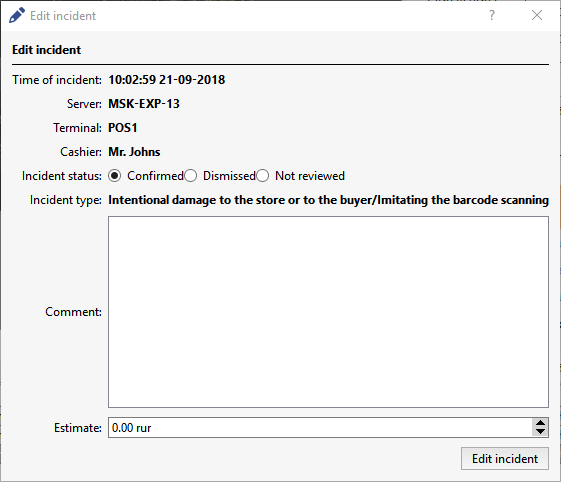
You can always change the status of a confirmed or dismissed incident by selecting it in the list and clicking the Edit button.
