To add a TRASSIR object to the map:
- Right-click anywhere on the map.
- In the context menu that appears, select Add object.
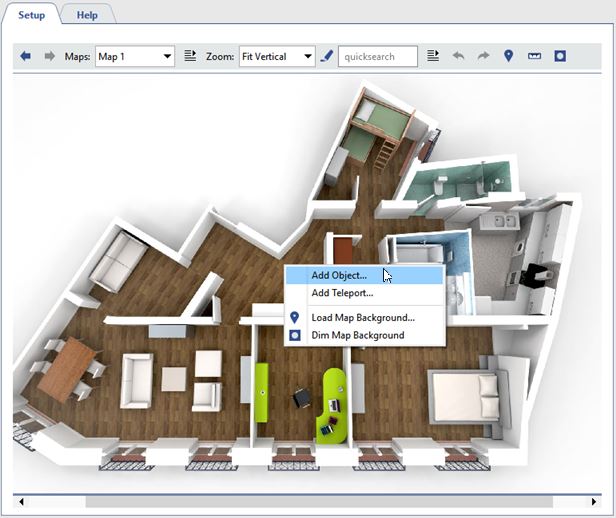
- In the list of objects, double-click on the object to be added to the map (for example, a camera).

Tip
You can add other objects to the map in a similar way, such as servers, boards, IP-devices, Orion devices, floor areas.
An example of adding a floor area is described in section Adding floor to the map.
- Close the list of objects by clicking anywhere on the map.
- Put the camera you just added in the desired location on the map. To do this:
Left-click with the mouse to select the camera and drag it to the desired location on the map.
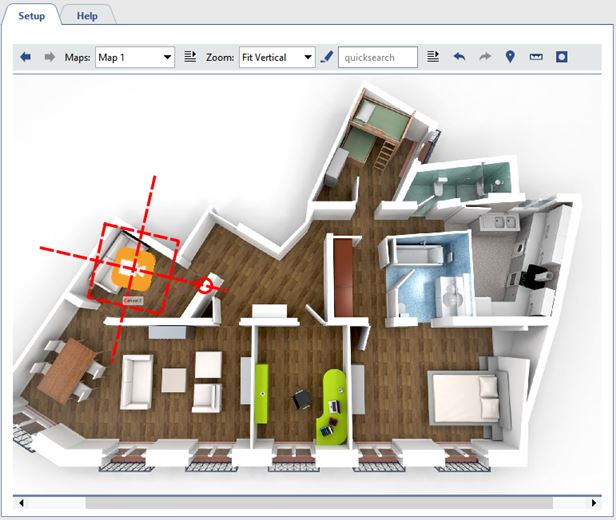
Left-click near the red circle and drag to set the required rotation and scale on the map.
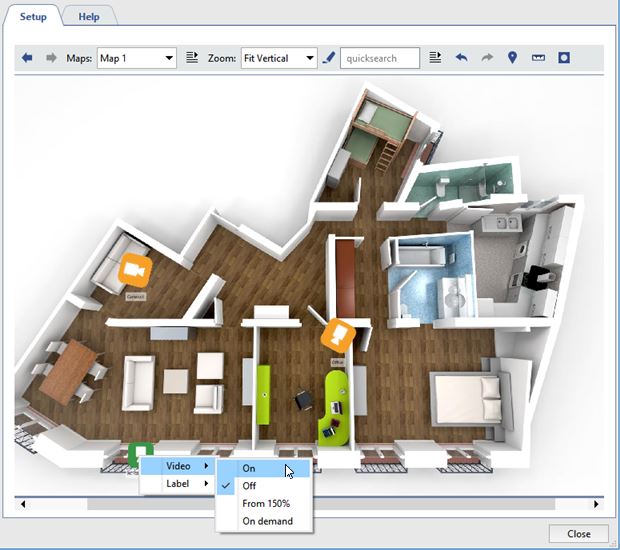
- Specify the camera's video display settings. To do this:
- Point the cursor at the camera icon and right-click.
-
In the opened context menu set up the Video parameters:
"Disable" - if the camera's video does not need to be displayed on the map.
"Enable" - if the camera's video needs to be displayed on the map.
"Enable at 150% zoom" - if the video should be displayed only when the map's zoom level is 150% or more.
"On demand"—if videos are only need to be opened on demand by double clicking the channel icon.
Tip
After making your selection, the video display area will be shown. If desired, you can change the area's size and location on the map.
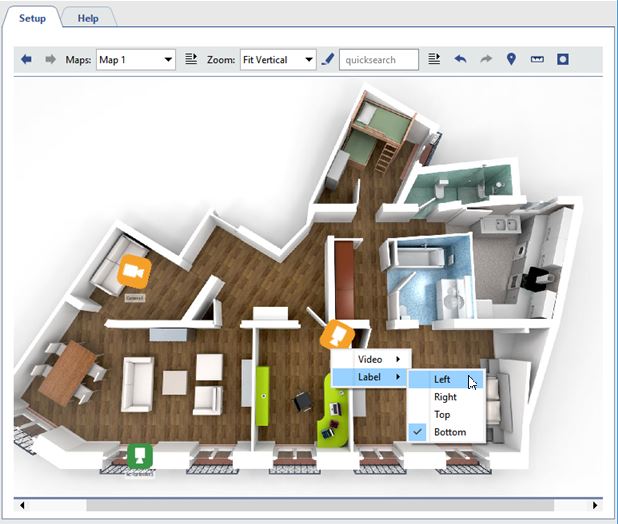
- Specify how the caption will be displayed relative to the camera icon (it is displayed below by default). To do this:
- Point the cursor at the camera icon and right-click.
- In the context menu that opens, use the Caption submenu to select a caption display option.
The currently selection option is marked with a checkmark. To disable the caption for an icon, select the currently selected option (this will clear the checkmark; see the figure).