Each schedule can have three types of zones: green, red, and blue. The zones can be arbitrarily interleaved one after another. There can be any number of zones.
You can create the required number of schedules on a server and then automate the server by using rules to apply the schedules to TRASSIR objects.
To create a new schedule:
- Open the Settings window.
- Select Automation.
- Click the Create new schedule... link.
- Name a schedule.
- Set the Snap to 30 minutes checkbox if you want the schedule divided into 30-minute zones. If this checkbox is cleared, the schedule will not be divided
and the actual zone size will be determined by highlighting an area with the mouse.
Regardless of the checkbox's state, you can manually correct the beginning and ending of a zone using the "from" and "to" fields.
- Divide the days of the week and each day itself into zones. To create a zone:
- Use the mouse to select a rectangular area;
- If necessary, manually correct the zone's temporal boundaries;
- Click the zone fill button.
- Set the Enable schedule checkbox. If a schedule is disabled, then the system will not generate events when the schedule enters any given zone. Therefore, the schedule will not work.
Once a schedule has been created, it can be used, for example, to enable and disable video camera recording. Moreover, one schedule can be used to control an arbitrary number of objects (not only cameras). To use a schedule, create a rule with the "On schedule" activation type and define the actions to be executed when the schedule enters the various zones.
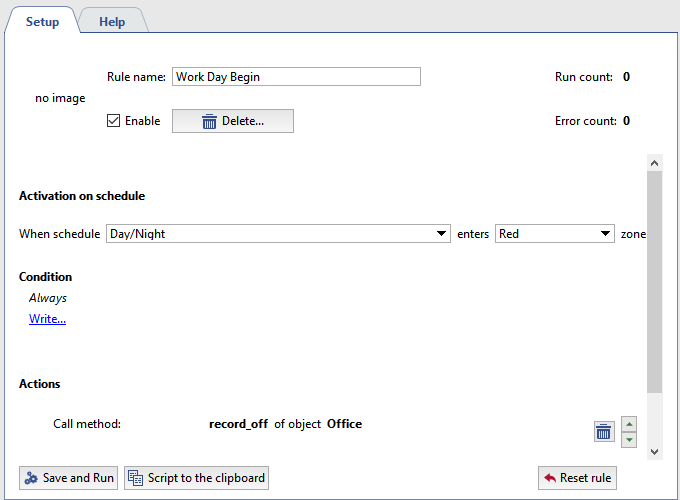
For example: A camera records a facility during nonworking hours (at night).We need to stop recording the camera when the workday begins.
To use a schedule:
- Create a new schedule in accordance with the previously described procedure.
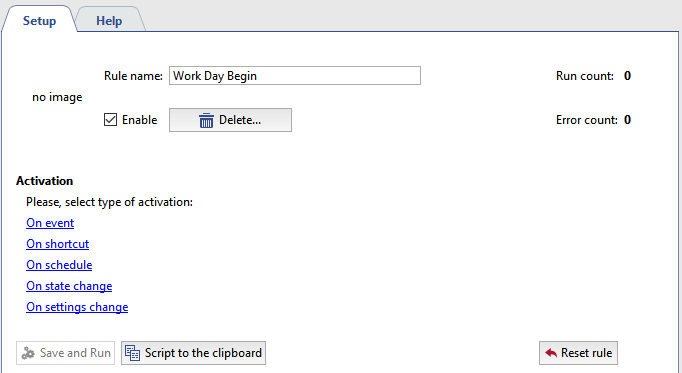
- In the Settings window, select Scripts.
- Click the Create new rule... link.
- Give the rule in name and select the "On schedule" activation type.
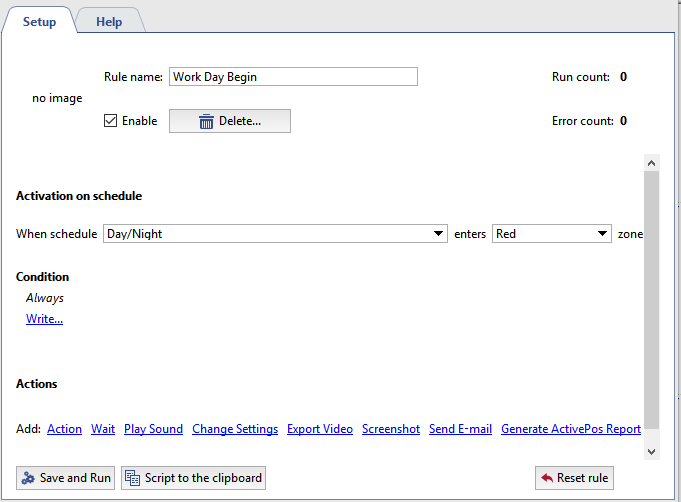
- Select the previously created schedule from the When schedule list and select the zone that, when entered, should trigger execution of the action.
- If necessary, specify condition for the execution of the rule, or leave the default value (the rule will always be executed when the schedule enters the specified zone).
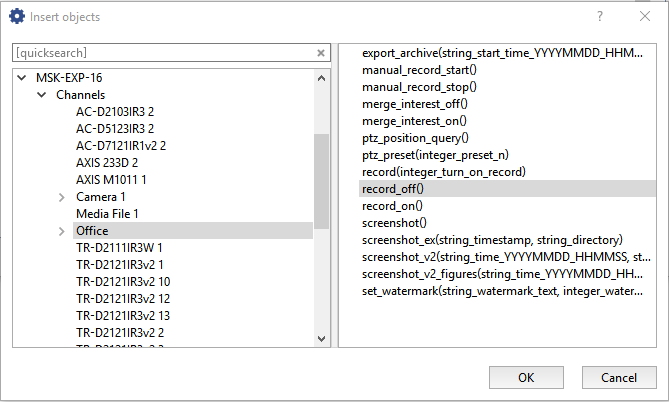
- In the list of possible actions, click the Call method link.
- Select an object (camera) and action to be executed (record_off).
- Verify that the rule has been correctly constructed and click Save and run. The rule will be active in the system, and recording will be disabled for the Lancam-CD812 camera when the schedule enters
the specified zone.