A Role is a set of permissions and rules which determine user access rights to various TRASSIR CMS objects.
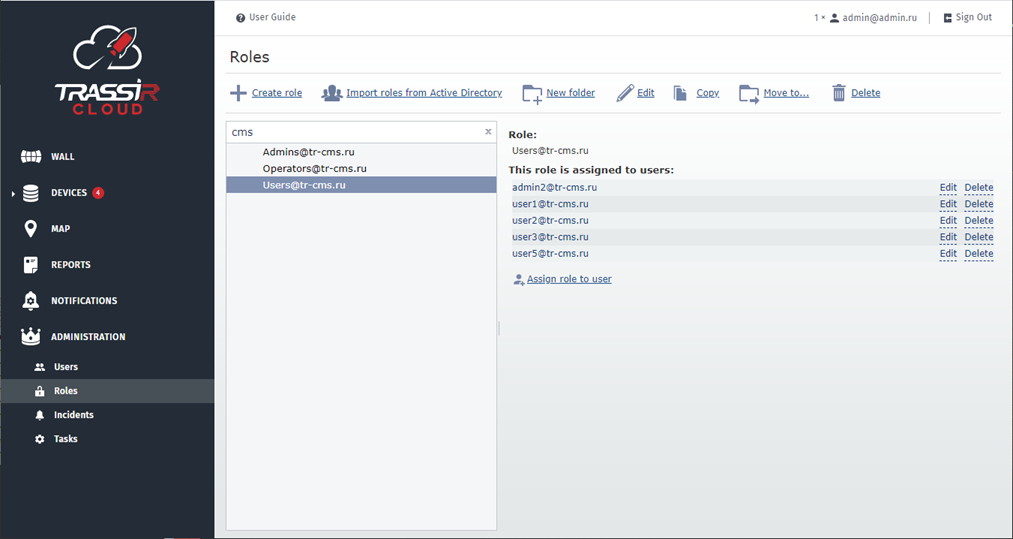
Use top menu links to:
- Create role.
- Import roles from Active directory - add roles from Active Directory (LDAP).
- New folder - create a folder and add roles in it.
- Edit - edit role parameters.
- Copy - make a copy of the selected role.
- Move to... - move a folder or a role to another folder.
- Delete - delete role or a folder with the roles. All roles, contained in the removed folder, are moved to the Root folder.
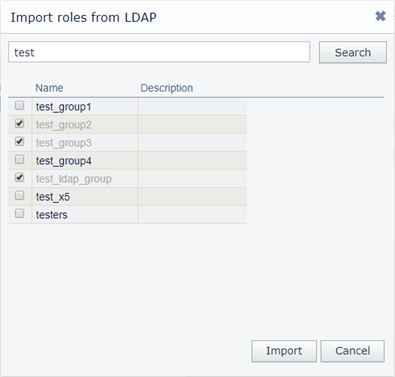
TRASSIR CMS allows importing user roles from LDAP server. To do this follow the next steps:
-
Click the Import roles from Active directory link.
-
For searching users on server, enter the name in the opened window and press Search.
-
Select records you would like to add to CMS role list and press Import.
All imported from LDAP server roles will be marked in the list of roles by the icon
 .
.
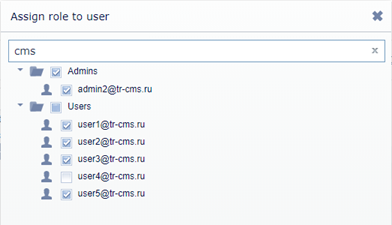
If you've created users you can assign roles to them. To do this, select the role in the list and click Assign to user. Select one or several users in the opened window and press OK to save settings.
Important
Pay attention when assigning multiple roles to a single user. For details see Specific features of assigning multiple roles to a user.
Parameters describing the role
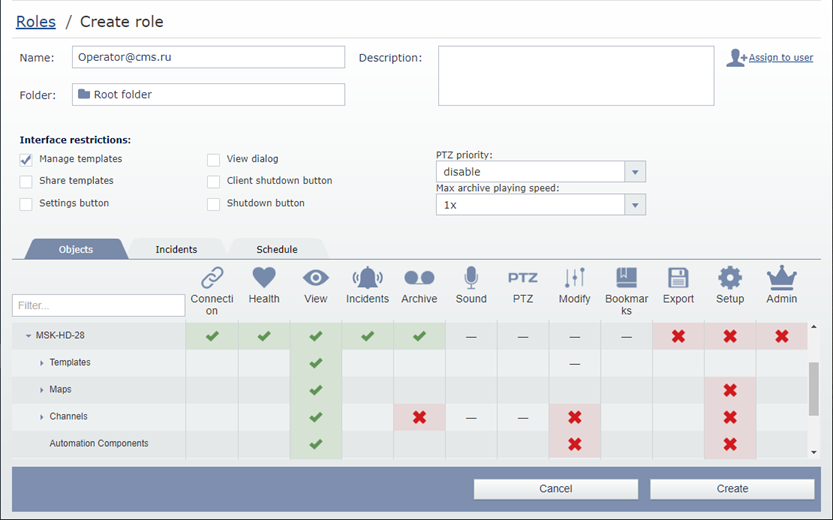
The restrictions and the parameter values in the Interface restrictions settings group determine user rights in operator's interface.
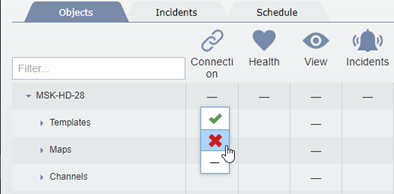
The Objects tab lets you specify user access rights to the objects, connected to TRASSIR CMS. Here you can determine which option will be enabled or disabled in the role, assigned to the user.
The object access rights system has its own hierarchy, which contains basic (global) objects, groups of objects (several levels) and standalone objects. When the access right to the superior object is changed, it is automatically implemented to all inferior objects.
Click the cell and select one of the following variants to change the access right:
Table 173.
 |
Allow user using this feature while working with the selected object. |
 |
Forbid user using this feature while working with the selected object. |
 |
Access right to the selected feature is unknown. |
Tip
In order to set access right for several objects simultaneously, press SHIFT or CTRL and mark the required lines with the cursor. After that, when changing access rights, the same right will be automatically implemented to all marked lines.
Tip
You can filter the object list to see objects with the specific feature enabled or disabled, by pressing the table headings.

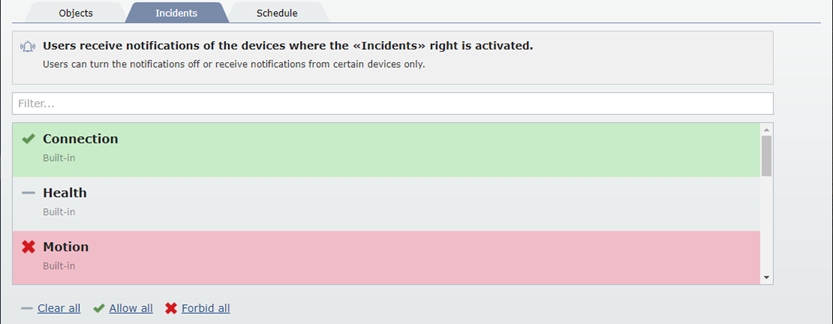
The Incidents tab lets you configure the specific role access rights to the incidents. Users receive notifications about the operation of the devices with the help of the incidents.
The Schedule tab lets you set up the time period of the role.

You can use the following settings to do this:
- In orders to specify the time periods, within which the role will be active, highlight them in the table and set Enable schedule flag.
-
In order to specify the duration of role, check the Grant temporary access for box and set up time. The countdown of time will start and the moment when user to whom this role is assigned connects to the server (e.g. when authorizing). It stops at the moment when user disconnects from server (e.g. by pressing Sign out on control panel).
Check the Grant temporary access until box to specify the role daily limit. The time resets daily at 00:00 or by clicking Reset timer in user settings.

- In order to specify the role time period, check Grant temporary access until box and enter date and time. On this date the role will stop acting for all users, to whom it was assigned to.
Tip
You can use settings on the Schedule tab separately as well as together, thus creating any rule, determining time and action limits of this role. You can customize access by schedule in order to forbid the employees to connect to the video surveillance system outside working hours. Besides, you can set up access limits in order to specify maximum time of video surveillance system use.


