To activate the plugin go to Channel settings to the Software detectors area and select Queue Detector. Click the Setup queue detector to open the settings window.

In the opened detector settings window a Ground plane, which should be configured, will be already created.
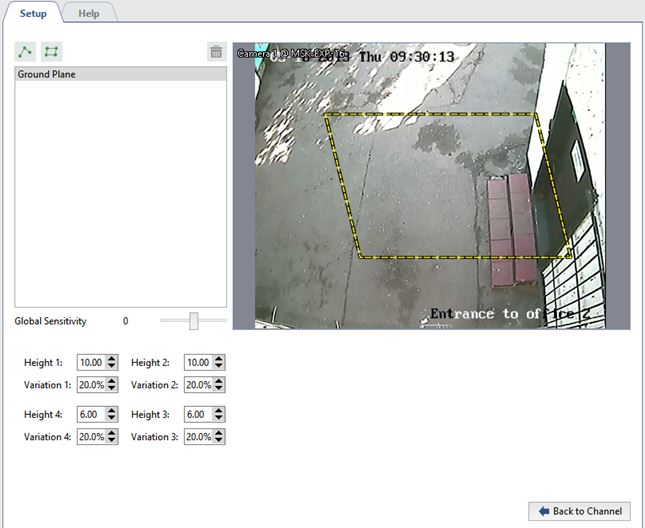
A camera is usually pointed at an angle relative to the surface of the floor. Accordingly, the same person will have different dimensions in various places on the frame. For the counter's proper operation, the Ground Plane must be configured to enable counting in the entire area. To dot this, move the Ground Plane's vertices to define the area within the frame to be monitored by the counter. Then sequentially select the vertices and use the Height settings to define the size of a person's head at the extreme positions of the Ground Plane.
The counter can be more accurately configured with the assistance of a helper. You can verify the accuracy of the selected settings based on the size of his/her head. Ask your helper to move sequentially to each of the Ground Plane's vertices. Change the values of the Height parameters to specify the size of a head. So, you can verify the size of your helper's head using an indicator consisting of concentric squares. If you point it at a person's head, green squares will indicate that at that position in the frame people with heads that fit within the green squares will be detected, while people with heads the size of the gray squares will not be detected by the counter.
Tip
If you have no helper or cannot use it, you can go to an archive and configure the counter using saved video segments.
The Variation parameter defines the range of the Height parameter. For example, if it is 10%, then the counter will analyze an area 10% smaller and 10% larger than the selected area.
To prevent false triggerings, adjust the Global Sensitivity parameter.
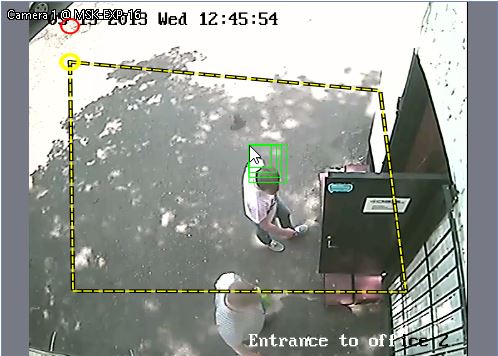
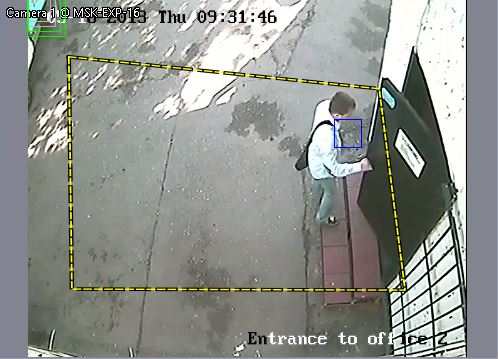
If the counter is configured correctly, the heads of people within the frame will be highlighted with a blue square.
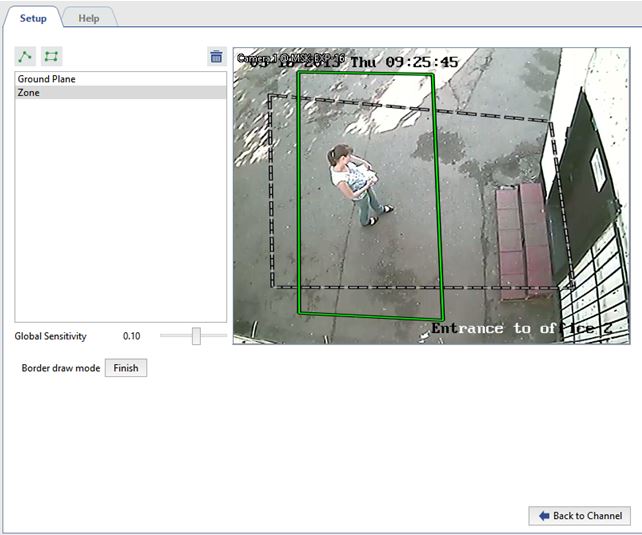
Queue detector can be used to count the number of people:
-
within a selected area.
To do this, click the
 button and specify an area within the Ground Plane.
-
intersecting a border line from either direction.
To do this, click the
 button and add the border line. If needed, you can switch the locations of zones A and B by setting the Swap AB -> BA
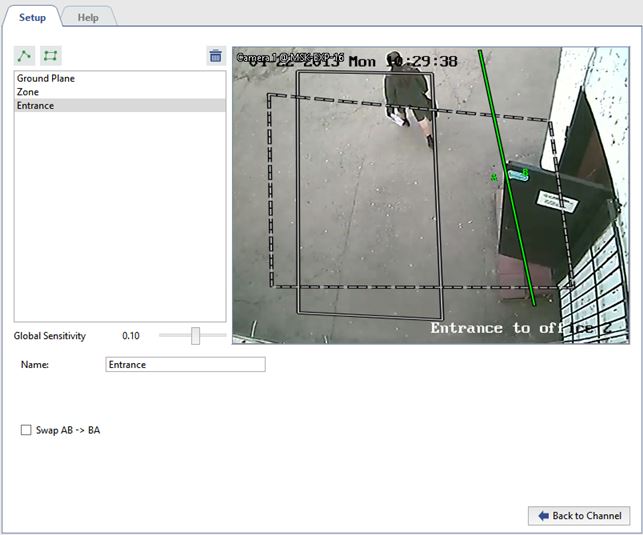
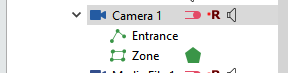
In a real-time environment the selected area status and limits can be monitored in the object tree (CMS). When the number
of people in the selected area increases the indicator will change the color  →
→  →
→  →
→  →
→  →
→  :
:
Tip
To track the detector's state in a timely fashion, you can create a rule or script that will activate when the state changes.
