To export one or more archive fragments into a video file:
- Select the channel the archive fragment of which should be exported.
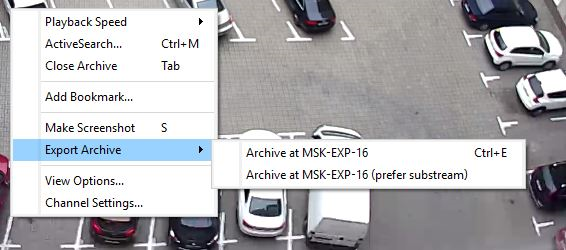
- In the context menu, select Export archive... and select the archive option you would like to export:
Tip
You can find a description of all archive export options in the section Working with the archive.
The archive export settings window will open:
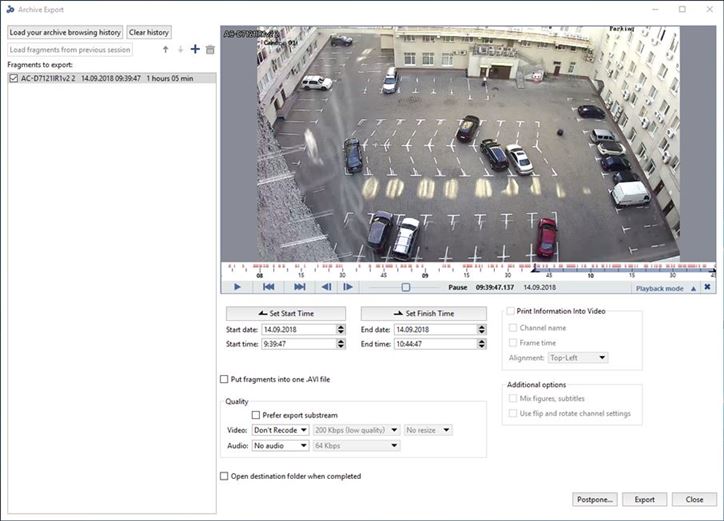
The left part of the window contains settings for creating a list of channels from which you want to export fragments. Moreover, the created Fragments to export list will let you export one or more archive fragments. You can use the following buttons to create the list:
- Click the Load your archive browsing history to add channels to the list, from archives that were viewed before archive export.
- The Clear history button clears the archive playback history.
- Click the Load fragments from the previous session button to add segments to the list that were used in the previous export operation.
- Using the
 and
and  you can move the selected fragment in the list in order to determine its position in the exported file.
- To add or remove a channel from the list, respectively click
 and
and  .
.
-
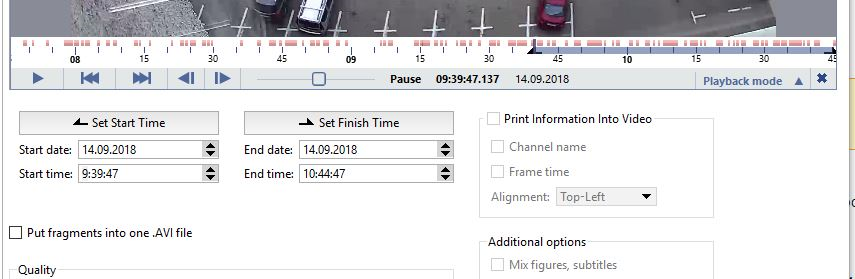
The right part of the window contains settings for the selected archive fragment. Move the mouse cursor along the timescale to determine the fragment's start. If necessary, adjust the values in the Start date and Start time fields. In order to record the selected time as the starting point for the exported fragment, click the Set start button.
Set the end time for the exported object in the same way.
Note that thecurrent fragment to export is indicated by the line with black arrows
 .
.
Important
When exporting archive from the cloud cameras, the duration of a fragment depends on the TRASSIR Cloud camera tariff.
- If needed, specify additional export settings:
- Set the Put fragments into one .AVI file checkbox if you want all selected archive fragments to be combined into a single file. In doing so, all settings described below will be applied immediately to all archive fragments.
-
In the Quality settings group, set the Prefer export substream checkbox if only the substream data needs to be exported.
In the Video and Audio dropdown lists, select the desired video and audio encoding formats and indicate the encoding quality (number of kilobits per second).
- Set the Print Information Into Video checkbox; select the text and its position in the exported video.
-
In Additional options settings group:
Set the Mix figures, subtitles flag in order to save figures and subtitles on the exported video.
Set the Use flip and rotate channel settings checkbox to apply the selected channel settings to the exported video.
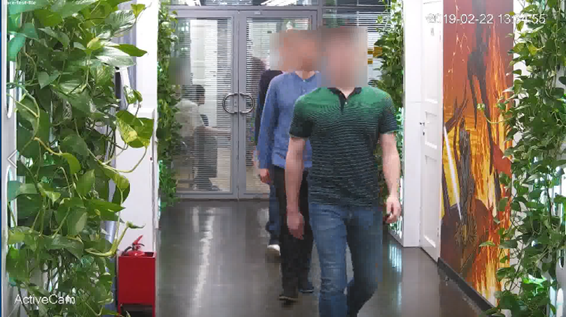
Set the Blurring faces flag to conceal recognized people's faces on exported video.
Important
The Blurring faces option is available only on TRASSIR OS and with the corresponding license.
- Set the Open destination folder when completed checkbox if, after the export process is complete, you want to immediately go to where the file was saved.
- Select the type of export you want by clicking one of the following buttons:
- Postpone... - the export will be postponed (the export date and time will be specified in a popup window).
- Export - the export will begin as soon as you press the button.
